Last spring, a park ranger stopped me on a quiet dirt trail. I needed ebike classes 1, 2 and 3 explained before buying my first ride. Instead, I bought a fast commuter bike and broke local trail laws.
My palms sweated as he pointed at the sticker on my frame. That mistake pushed me to test all three bike types for six months. Now I will share what those frame numbers mean on real roads.
Ebike Classes 1, 2 and 3 Explained in Plain Words
The three ebike classes group bikes by top speed and throttle use. You can spot your bike class by checking its motor help rules.
When I first walked into a bike shop, the sales talk felt confusing. Every tag showed watts, volts, and class numbers that looked the same.
I rented one bike from each group to test them back to back. That week on paved streets and dirt paths cleared up all my confusion.
Here is how those three groups break down in plain talk:
Class 1 bikes. The motor only kicks in when your feet push the pedals. Motor help stops right when you hit 20 miles per hour.
Class 2 bikes. You get a twist grip or thumb button called a throttle. It moves the bike up to 20 mph without pedaling at all.
Class 3 bikes. You must pedal to get motor help up to 28 mph. Most state laws stop any throttle on this bike at 20 mph.
Why Frame Stickers Confused Me During My First Week
Every legal electric bike carries a small white sticker on the metal frame. That label lists the class number, top speed, and motor watt size.
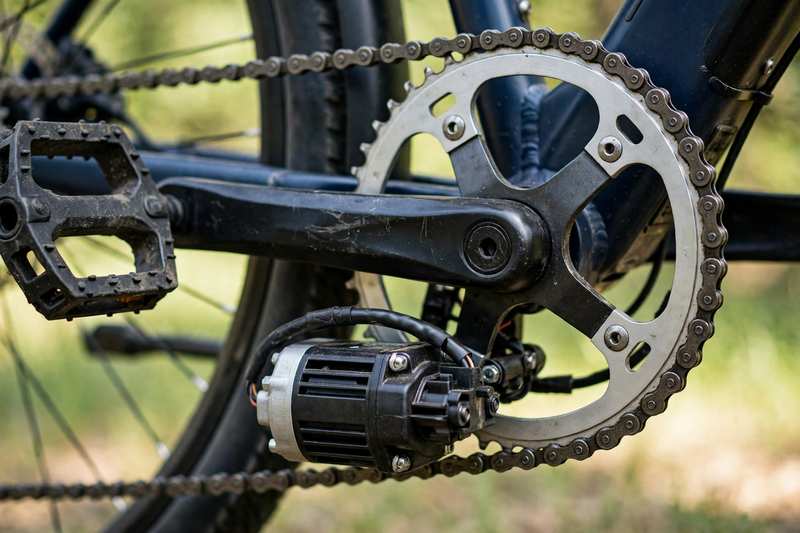
I ignored that sticker near the bottom pedal crank on day one. I thought all bikes with a 750-watt motor worked the exact same way.
They do not work the same way once your tires touch public paths. A park ranger can read that bold class number from ten feet away.
My Early Wake-Up Call: Never trust a seller who says all electric bikes can ride anywhere. Always check the frame sticker near the pedals before you hit public trails.
Once I rode each type for a full month, the gap became clear. Here is how each class fared during my daily tests.
| Option I Tried | Best Use Case | My Honest Verdict |
|---|---|---|
| Class 1 mid-drive bike | Dirt trails and park paths | Feels like a normal bike |
| Class 2 fat-tire bike | Grocery runs and sore knees | Best pick for easy rides |
| Class 3 road commuter | Long city rides in traffic | Fast on paved city streets |
| Class 2 folding bike | Train trips and small flats | Easy to store indoors |
How Each Motor Feels When You Ride Every Day
Each bike class changes how hard your legs work on flat streets. The right setup depends on your knees, hills, and daily ride length.
On paper, an eight-mile-per-hour gap between classes looks tiny. Out in cold wind and rush-hour cars, eight miles per hour feels huge.
I strapped a phone GPS to my handlebars to track my true speeds. Over four hundred miles, each class showed clear strengths and annoying quirks.
Testing Ebike Classes 1, 2 and 3 Explained on Steep Hills
A Class 2 throttle saves your knees when starting on a steep hill. Without a throttle, you must push hard in low gear to start moving.
I live at the bottom of a nasty 12-percent paved hill. I wanted ebike classes 1, 2 and 3 explained by real hill tests. So I rode all three bikes up that slope carrying twenty pounds of groceries.
First, I rode my Class 1 bike. I dropped down to first gear before the steep climb started. My heart raced, and I climbed at 11 mph while pedaling hard.
Next, I used my Class 2 throttle. I stopped halfway up the steep slope on purpose to test it. One push of my right thumb got me rolling with zero leg strain.
Last, I pushed the Class 3 bike. On the flat approach, I hit 26 mph with fast pedal spins. That speed carried me halfway up the hill before I shifted down.
How Pedal Sensors and Throttles Change Your Daily Ride
Pedal sensors read either your foot speed or your leg push force. Throttles skip those sensors and send power straight from your 48-volt battery.
Cheaper Class 2 bikes use a cadence sensor that reads crank spins. As soon as your pedals turn half a circle, the motor surges forward.
Better Class 1 and Class 3 bikes often use a torque sensor instead. It measures how hard your shoes press the pedals and matches your effort.
My Knee-Saving Trick: Even if you love pedaling, a Class 2 throttle helps at red lights. Press it for two seconds to cross busy streets without wobbling.
I tracked my exact speeds, battery draw, and maintenance habits across my weekly rides.
| Size / Scenario | Exact Amount | How Often |
|---|---|---|
| Class 1 and 2 speed cap | 20 mph max motor help | Every time you ride |
| Class 3 pedal speed cap | 28 mph max motor help | Only on paved roads |
| Legal motor power limit | 750 watts max in US | Checked at bike build |
| My tire pressure check | 35 psi for city roads | Every Sunday morning |
| Hydraulic brake pad check | 2 mm pad thickness left | Once a month |
Big Myths About Ebike Classes 1, 2 and 3 Explained
Most new riders think a higher class number always means a better bike. In my tests, the fastest bike often caused the biggest daily headaches.
Online forums are full of bad advice from folks who never commute. When you get ebike classes 1, 2 and 3 explained through real miles, myths fade.
I wasted money on gear I did not need because of internet hype. Here is how common bike advice held up during my street tests.
| Common Advice | My Real-World Test | Better Move |
|---|---|---|
| Buy Class 3 for every ride | Blocked from local park trails | Buy Class 1 for parks |
| Throttles make riders too lazy | Saved me with a sore knee | Use throttle for hill starts |
| 750 watts climbs any hill | Hub motor got way too hot | Pick mid-drive for steep hills |
| You can cruise at 28 mph | Wind drag drains battery fast | Ride at 20 mph instead |
Why Faster Top Speed Drained My Battery Twice as Fast
Riding a Class 3 bike at 28 mph cuts your battery range in half. Wind pushes back hard against your chest once you pass 20 mph.
My test bike came with a standard 48-volt, 14-amp-hour battery pack. The box promised fifty miles of range on a single wall charge.
I plugged a digital watt meter into my wall outlet after every trip. That small tool showed me how much power high speeds truly burn.
Here is what my handlebar screen showed after real road tests:
Cruising at 15 mph in Class 1 mode. I got 46 miles of range before the last battery bar blinked.
Using the Class 2 thumb throttle non-stop. My battery died at 21 miles on flat city streets.
Pushing 28 mph in Class 3 mode. The battery ran dry after just 18 miles against a light breeze.
Watch Your Wind Drag: Drop your speed from 28 mph down to 20 mph on windy days. That tiny drop gave me ten extra miles of battery life.
Mistakes I Made With Local Trail and Road Rules
Local park boards set their own rules for electric bikes on dirt trails. A bike that is legal on city streets may be banned in woods.
During my first month, I made dumb errors with speed and trail signs. I also burned through cheap brake pads because 28 mph stops take real force.
Those early slip-ups cost me time, sore legs, and a stern ranger warning.
| My Early Mistake | What Happened | What I Do Now |
|---|---|---|
| Rode Class 3 on dirt paths | Ranger made me walk out | Check trail maps before riding |
| Held throttle up long hills | Motor shut off from heat | Pedal along on steep climbs |
| Used cheap rim brake pads | Took too long to stop | Switched to disc brake pads |
| Left bike in Class 3 mode | Battery died two miles out | Use low assist on flats |
Which Bike Class Fits Your Daily Ride Best
Your local roads and leg strength decide which bike class you should buy. Buying the wrong class leaves you stuck on roads you hate riding.
Before you spend two thousand dollars, look at where your tires roll most. A bike built for fast car traffic feels awful on narrow park loops.
When to Pick Low Speeds Over Fast Road Bikes
Pick a 20 mph bike if you ride near walkers, dogs, or trees. Save the 28 mph Class 3 bikes for wide streets with fast cars.
On quiet river paths, passing joggers at 28 mph is scary and rude. Even at 18 mph, I ring my brass bell twice before passing anyone.
Use my real-world checklist to match your routine to the right motor:
Buy a Class 1 bike if: You want exercise on woods trails, wooden bridges, and paved river paths.
Buy a Class 2 bike if: You haul heavy food bags, have stiff knees, or want sweat-free rides.
Buy a Class 3 bike if: You ride over five miles on roads with 35 mph speed limits.
Skip Class 3 completely if: You mostly ride with slow kids or on narrow park sidewalks.
Quick Fixes When Your Bike Class Feels Wrong
You can tune many bikes without buying a brand-new frame or motor. A quick menu change or unplugged wire often solves a mismatch fast.
Many brands build one bike that shifts between Class 2 and Class 3. You just hold the plus and minus buttons to open the speed menu.
The Two-Minute Trail Fix: Many Class 2 bikes use a simple plug on the throttle wire. Unplug it before a park ride, and your bike runs like Class 1.
When my friends hate how their new bike rides, I check four things.
| Warning Sign | Real Cause | My 2-Minute Fix |
|---|---|---|
| Motor jerks hard at start | Assist level set too high | Drop screen to level one |
| Stops helping at 20 mph | Locked in Class 2 mode | Raise limit in screen menu |
| Feet spin way too fast | Bike stuck in low gear | Shift rear gears up higher |
| Throttle stops working mid-ride | Brake cut-off sensor is stuck | Flick both brake levers out |
My 3-Step Plan to Pick Your Right Class Today
You can pick your ideal bike class in fifteen minutes without guesswork. Just map your normal route, check park signs, and test two sensors.
When friends ask me for ebike classes 1, 2 and 3 explained, I share this plan. It stops you from paying extra for speed you cannot even use.
Map your main five-mile loop. Write down how much is dirt trail, bike path, or busy street. If over half is park path, cross Class 3 off your list now.
Check your knee and hill needs. Count the stop signs sitting at the bottom of hills on your route. Two or more hill stops mean you will love a Class 2 throttle.
Test both sensor types in a lot. Ride one cadence bike and one torque bike at a local shop. Pick the one that feels smooth when you start from a full stop.
My Shop Test Rule: Never test a new bike only on flat concrete parking lots. Find one steep driveway near the shop to test the low-speed push.
Follow this quick timetable before you hand over your credit card.
| Step | Time Needed | Key Shortcut |
|---|---|---|
| Check local park website | 5 minutes | Search page for Class 1 |
| Map your daily ride route | 5 minutes | Spot painted street bike lanes |
| Check hills on your route | 3 minutes | Count stops on steep slopes |
| Test ride two bike classes | 15 minutes | Start on level one assist |
FAQs for ebike classes 1, 2 and 3 explained
What is the main difference between Class 1 and Class 2 ebikes?
Class 1 only helps when you pedal, while Class 2 adds a throttle. Both types stop giving motor help once you hit 20 mph on flat ground.
Can you ride a Class 3 ebike on regular bike paths?
Most parks ban Class 3 bikes from shared multi-use bike paths. You must ride them on roads or inside painted street bike lanes instead.
Does a Class 3 ebike ever come with a thumb throttle?
Some Class 3 bikes include a throttle that stops at 20 mph. To reach the 28 mph top speed, you must pedal the bike yourself.
Do I need a driver license for a Class 1, 2 or 3 ebike?
You do not need a license, tag, or insurance for these three classes. Most states only ask that Class 3 riders be at least 16 years old.
Can I change my ebike class in the display screen settings?
Many modern bikes let you switch between Class 2 and Class 3 modes. You just change the top speed limit inside the handlebar screen menu.
Which ebike class gives the longest battery range per charge?
Class 1 bikes give the best range because you always pedal along. Using a Class 2 throttle or riding at 28 mph drains batteries fast.
Picking Your Best Bike Class Before You Buy
The best electric bike is the one allowed on your favorite local paths. In my garage, my 20 mph Class 2 bike gets the most miles. It lets me cruise quiet park trails or rest my legs after work.
Take five minutes today to open your phone map and trace your route. Look up your nearest park trail rules before visiting a bike shop. That simple check will save you money and keep every ride stress-free.

Leave a Reply