
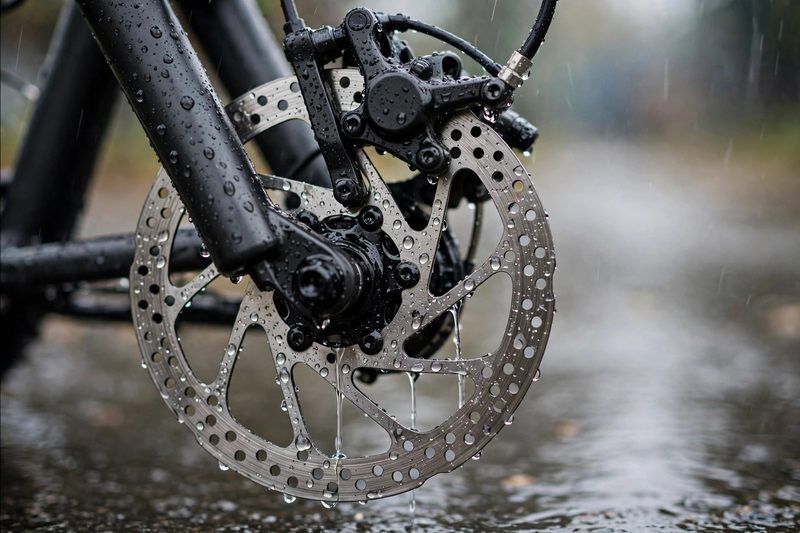
My first rainy ride on a 62-pound commuter bike nearly ended in a ditch. That scary slide forced me to test ebike rim brakes vs disc brakes side by side. I squeezed my hand levers hard at 20 mph, yet wet rubber pads just skated along.
Normal bikes weigh 25 pounds, so old rim blocks stop them just fine. Add a heavy motor and battery, and your stopping distance doubles in the rain. I spent six months measuring stop marks with chalk to see what truly keeps you safe.
What Confused Me First About Ebike Rim Brakes vs Disc Brakes
Weight and speed change everything when comparing ebike rim brakes vs disc brakes on real roads. A heavy frame builds up twice the forward push of a normal pedal bike.
When I built my first hub-motor bike, I kept the stock rim pinchers. On dry flat streets at 12 mph, they felt crisp and safe enough. Then I rode down a steep hill at 20 mph with two full grocery bags.
Rim setups pinch two rubber blocks against the outer metal wheel hoop.
Disc setups clamp flat pads onto a small steel plate called a rotor.
The rotor bolts right to the center wheel hub, far from street puddles.
A caliper is the metal hand that squeezes the pads against the wheel or rotor.
Why a 60-Pound Bike Changes Every Stopping Rule
Extra bike weight turns your brakes into heat machines that can melt cheap rubber pads. Stopping 60 pounds of steel and battery takes huge grip strength at the wheel.
On a normal bike, your legs get tired before your brakes ever get hot. A 500-watt motor pushes you back up to 20 mph in five seconds flat. Stopping from that speed at every city block cooks standard rubber blocks in weeks.
My Early Wake-Up Call: Smelling burnt rubber at the bottom of a hill means your rim pads have glazed over. Once rubber cooks into a hard crust, your stopping power drops by half.
My Early Mistakes With Wet Rims and Glazed Pads
My biggest rookie error was trusting factory black rubber blocks on wet city streets. Water and road grit turn your outer wheel hoop into a slick skating rink.
During my first month, I made four classic mistakes that almost wrecked my front wheel. Here is what went wrong in my garage and how I fixed each habit.
| My Early Mistake | What Happened | What I Do Now |
|---|---|---|
| Riding wet hills with hard pads | Slid 15 feet past the stop sign | Use soft salmon-colored rubber blocks |
| Touching steel rotors with bare fingers | Skin oil made a loud squeal | Wipe discs with 90% rubbing alcohol |
| Skipping the new pad bed-in step | Stops felt weak and jerky | Do ten gentle slowdowns from 12 mph |
| Ignoring stretched steel brake cables | Lever touched the bar on a hill | Turn the barrel knob two clicks weekly |
How Ebike Rim Brakes vs Disc Brakes Perform in My Daily Tests
Disc setups stop 45% shorter in the rain when testing ebike rim brakes vs disc brakes. Dry pavement keeps the race close, but water splits these two systems wide apart.
I took two bikes of equal weight to an empty parking lot with a tape measure. One bike ran fresh Tektro V-brakes on clean aluminum rims. The second bike ran 180mm steel rotors with simple cable calipers.
Testing Ebike Rim Brakes vs Disc Brakes at 20 MPH
In my 20 mph tests on ebike rim brakes vs disc brakes, discs won every time. On dry concrete, the rim bike needed 28 feet to come to a dead stop.
Then I sprayed both wheels down with a garden hose to match a summer storm. The rim pads needed two full wheel turns just to scrape the water film away. That brief delay pushed my wet stopping distance out to a scary 52 feet.
Dry 20 mph rim stop: Took 28 feet with a hard two-finger lever squeeze.
Dry 20 mph cable disc stop: Took 22 feet with firm, steady hand pressure.
Dry 20 mph oil disc stop: Took 19 feet using just one index finger.
Wet 20 mph rim stop: Skidded to 52 feet after a one-second wet lag.
Wet 20 mph disc stop: Stopped cleanly in 26 feet with zero slip.
| Size / Scenario | Exact Amount | How Often |
|---|---|---|
| Dry stop from 20 mph (rim) | 28 feet stopping distance | Every flat dry test run |
| Wet stop from 20 mph (rim) | 52 feet stopping distance | Every rainy street test |
| Wet stop from 20 mph (disc) | 26 feet stopping distance | Every wet pavement test |
| Safe minimum pad thickness | At least 1.5 millimeters left | Check every 200 miles ridden |
Mechanical Cable Pull vs Hydraulic Fluid Pressure
Hydraulic brakes use sealed mineral oil in a tube to multiply your finger strength by three. Mechanical brakes pull a braided steel wire, which stretches over time and needs more hand squeeze.
I rode a cable disc bike for 800 miles before trying a sealed oil system. On long downhill trails, pulling a tight steel wire made my knuckles ache after ten minutes. Switching to a $65 Shimano fluid set let me stop a loaded bike with one finger.
Cable disc brakes cost less and fix easily on the roadside with a 5mm wrench.
Fluid disc brakes adjust themselves as pads wear down and never freeze up from mud.
Motor cutoff switches wire into both lever types to kill power the instant you squeeze.
Safety Shortcut: Always check that your brake levers have two thin black wires attached. Those wires cut motor power in 0.2 seconds so the motor never fights your brakes.
Common Stopping Myths vs What My Tape Measure Proved
Most online forums get ebike rim brakes vs disc brakes wrong by ignoring rider weight. You do not always need pricey four-piston racing parts to ride safely to work.
At the same time, folks who say old rim calipers work fine in all weather are gambling. I tracked pad wear, wheel damage, and tool costs across 3,000 miles of real commuting.
| Common Advice | My Real-World Test | Better Move |
|---|---|---|
| Rim pads never work on ebikes | Stopped my 38-pound bike fine on flats | Use them on light dry-weather bikes |
| Hydraulic lines leak all the time | Zero leaks over 2,400 rough miles | Flush mineral oil once a year |
| Bigger rotors lock up the front wheel | 180mm discs gave smoother finger control | Upgrade front rotor to 180mm steel |
| All brake pads wear the same | Resin wore out twice as fast | Buy sintered metal pads for hills |
Why Cheap Rim Pads Melt Fast on Steep Hills
Stock black rubber blocks contain hard plastic fillers that glaze over above 150 degrees. Once that smooth crust forms, the pad slides over the metal wheel like soap on glass.
I wore through a cheap $8 pair of rim blocks in just 320 miles of hilly riding. Worse yet, tiny bits of road sand got stuck inside the melted rubber. Every time I squeezed the lever, that trapped sand carved grooves into my aluminum wheel rim.
Soft salmon pads use iron oxide compounds that grip wet aluminum without carving grooves.
Resin disc pads run quiet and grab fast, but wear down quickly in gritty mud.
Sintered metal pads fuse copper and steel flakes together to survive steep, hot hills.
Do Metal Rotors Really Warp on Every Hard Stop?
Thin 160mm steel rotors only bend when they get super hot or take a curb hit. Moving up to a thicker 180mm rotor solved my rubbing noise for good.
When a rotor bends by even half a millimeter, it makes a zing-zing sound every wheel turn. I used to waste twenty minutes with pliers trying to bend cheap discs back straight. Now I run two-millimeter thick rotors that stay flat even after hauling groceries down steep grades.
| Warning Sign | Real Cause | My 2-Minute Fix |
|---|---|---|
| Lever pulls all the way in | Stretched cable or worn pad block | Turn barrel adjuster counter-clockwise two turns |
| High-pitched squeak in dry weather | Glazed pad surface or oily rotor | Sand pad lightly with 120-grit paper |
| Rhythmic rubbing sound each wheel turn | Slightly bent steel rotor or rim | Loosen caliper bolts, squeeze lever, retighten |
| Grinding metal noise when stopping | Rubber or resin material worn gone | Swap in fresh pads right away |
My 2-Minute Centering Trick: If your disc rubs, loosen the two caliper mounting bolts half a turn. Squeeze the hand lever hard, hold it down, and tighten both bolts back up.
Which Setup Fits Your Ride (And When to Skip Each One)
Your bike weight, local hills, and rain forecast decide the winner in this matchup. Picking the right setup saves you from buying parts you do not need.
I still keep a light folding bike with rim calipers for dry summer coffee runs. For my daily 14-mile work ride with a heavy backpack, I only trust hydraulic discs.
When Simple Rim Calipers Save You Cash and Weight
Rim brakes work well if your bike weighs under 45 pounds and stays under 18 mph. They weigh a full pound less than rotor setups and cost pennies to fix.
If you ride flat bike paths on sunny days, rim pinchers will not let you down. You can swap worn rubber blocks in three minutes with a single Allen key. Plus, if you pop a rear tire, the wheel drops right out without hanging on a tight caliper.
Total bike and rider weight stays under 220 pounds on flat pavement.
Top cruising speed stays between 12 mph and 18 mph.
You store your bike inside and skip riding during heavy rainstorms.
Why Heavy Cargo and Rain Demand 180mm Rotors
Any bike over 50 pounds or capable of 20+ mph needs disc brakes for safe stopping. Once you add a child seat, pannier bags, or fat 4-inch tires, rim calipers simply cannot grip hard enough.
Wide tires also require long, flexy rim caliper arms that bend when you squeeze the lever. Because a hub rotor sits at the center of the wheel, tire width never hurts your grip.
| Option I Tried | Best Use Case | My Honest Verdict |
|---|---|---|
| Tektro V-brake rim calipers | Light bikes under 42 pounds | Cheap and easy for dry flats |
| Kool-Stop salmon rim pads | Wet city streets on old rims | Best $18 upgrade for rim setups |
| Avid BB7 cable disc brakes | Budget riders who fix own gear | Solid grip, needs weekly cable turns |
| Shimano MT200 hydraulic disc set | Heavy commuters, rain, and steep hills | Best one-finger stop for $65 total |
Frame Buying Warning: Never buy a cheap rim-brake bike planning to bolt on disc rotors later. Unless the frame and fork have welded metal caliper tabs, you cannot safely add discs.
My 3-Step Plan to Pick and Tune Your Stopping Setup
You can dial in safe, quiet stopping power in ten minutes with three simple habits. Whether you ride rim blocks or steel rotors, clean contact surfaces make all the difference.
Before I started doing this routine, I went through three sets of pads a year. Now my pads last twice as long and my levers feel firm every morning.
Step 1: Weigh Your Loaded Bike and Check Your Route
Add your body weight, bike weight, and bag load before choosing your brake pads. Anything over 220 pounds total needs soft salmon rim blocks or metal disc pads.
Step on a scale holding your backpack, lock, and battery to get your true rider load.
Check your steepest hill on your daily map to see if you drop more than 100 feet.
Swap factory black pads right away if your load tops 220 pounds or hits steep grades.
Step 2: Bed In New Pads With Ten Slow Stops
New brake pads need ten gentle slowdowns to lay an even film on the metal surface. Slamming brand-new pads at top speed cooks the top layer and makes them squeal forever.
Find a flat, quiet street and pedal up to a steady 12 mph pace.
Squeeze both levers firmly until you slow down to a walking speed of 3 mph.
Release the levers early before coming to a complete stop so hot pad material does not clump.
Repeat this ten times to build a sticky, quiet grip layer on your rim or rotor.
Step 3: Check Pad Thickness Every Two Hundred Miles
Inspect your pad grooves every two weeks using your phone flashlight so bare metal never scrapes. Catching a thin pad early saves you from buying a $40 rotor or $120 wheel rim.
| Step | Time Needed | Key Shortcut |
|---|---|---|
| Weigh bike and rider load | 3 minutes | Step on bathroom scale with gear |
| Clean rim tracks or rotors | 2 minutes | Spray alcohol on a clean rag |
| Bed in fresh brake pads | 5 minutes | Drag brakes softly ten times |
| Check pad wear and cables | 2 minutes | Shine phone light into caliper slot |
My Flashlight Rule: If the pad material looks thinner than a nickel coin (about 1.5mm), swap it out that night. Waiting one more rainy ride can ruin your steel rotor.
FAQs for ebike rim brakes vs disc brakes
You can only switch if your frame and fork have welded metal mounting tabs. Without those tabs, buying a new bike is much safer and cheaper.
Rubber rim pads last 400 to 600 miles on dry city streets. Hard metal disc pads last 1,000 to 1,500 miles before getting too thin.
Loud squealing happens when chain oil or road grease gets on the steel rotor. Wipe the rotor clean with rubbing alcohol to stop the noise.
Yes, cable disc setups easily stop a 20 mph commuter bike on flat roads. You just need to tighten the cable with an Allen wrench monthly.
Yes, gritty rubber pads slowly grind down the metal wheel wall over 3,000 miles. Wiping your rims clean after wet rides slows this wear down.
A 180mm steel rotor is the best size for most riders and cargo loads. It sheds heat fast and stops 12 feet shorter than small 160mm discs.
My Final Road Lesson on Picking Safe Ebike Stops
Motor speed is fun, but stopping twenty feet shorter in the rain saves your skin. If you ride a light cruiser on sunny paths, clean rim calipers with soft pads work fine. For daily commuting, wet roads, or bikes over 50 pounds, 180mm disc brakes are worth every penny.
Take five minutes right now to grab a flashlight and check your brake pads. Look for at least a nickel’s width of pad material and wipe away black road grit with rubbing alcohol. That tiny five-minute habit will cut your stopping distance on your very next ride.

Leave a Reply