
Ebike Battery Replacement Guide: How I Swapped Mine
My old 48V bike pack died five miles from home in cold rain. I built this ebike battery replacement guide so you skip that long walk. Dead cells give clear warning signs weeks before they leave you stuck.
My first swap attempt made a loud blue spark and melted a plug. After testing six packs across three bikes, I nailed a safe 20-minute routine. You only need four basic hand tools and three quick meter checks.
What Most Guides Skip in an Ebike Battery Replacement Guide
Matching voltage is only half the job when you swap a dead pack. You must also match peak amp draw and cradle pin spacing first.
During my first swap, I bought a cheap 48V Hailong pack online. The case looked identical to my old frame tray, so I forced it on. Two pins bent right away, and a loose wire sparked against my frame.
Steady amp rating: This number shows how much continuous power your pack can safely push. If your controller pulls 20 amps, pick a 25-amp or 30-amp pack.
Top slide room: Slide-in cases need two full inches of top gap to unlock cleanly. Measure your frame triangle with a tape before you order a pack.
Wire color traps: Red does not always mean positive on cheap aftermarket cradle bases. Check which wire holds positive charge using a digital volt meter first.
Smart data locks: Brands like Bosch and Shimano block third-party packs using smart computer chips. Check if your cradle has two simple power blades or five tiny pins.
My Spark Lesson: Never slide a live pack onto a base with its switch on. Flip the pack switch off first so the metal blades never arc.
My workshop log tracks four early mistakes that cost me time and money. Use this chart so you skip my expensive first-time wiring errors.
| My Early Mistake | What Happened | What I Do Now |
|---|---|---|
| Kept old worn cradle | Loose pins overheated uphill | Swap tray and pack together |
| Skipped volt meter check | Reversed wires popped controller fuse | Probe red and black leads first |
| Bought weak 20A BMS | Pack shut off on hills | Pick BMS 10A above controller |
| Used twist wire caps | Road bumps shook wires loose | Solder XT60 plugs with shrink tube |
Tools I Actually Use for a Safe Pack Swap
Four simple tools under $40 handle any home ebike pack swap cleanly. You can skip pricey bike shop repair stands and huge crimp kits.
I wasted $90 on a giant wire kit during my first build. Those thin plastic crimp tips melted the first time I climbed a hill. Now I stick to solid brass plugs and glue-lined shrink tube that block rain.
Digital volt meter ($12): This pocket meter reads pack voltage and shows which wire is positive. I test every new pack port before I cut a single bike wire.
Yellow XT60 plug pairs ($8): These tough nylon plugs handle 60 amps of steady flow without getting warm. They snap together with a firm click and never shake loose on gravel.
Glue-lined heat shrink ($6): When you warm this black tube, inner glue melts and seals the joint. It keeps mud and road salt out of your fresh copper splices.
4mm and 5mm hex keys ($5): Almost every water bottle cage bolt uses a 4mm or 5mm hex head. Keep a ball-end wrench handy to reach tight downtube angles fast.
Dielectric grease tube ($7): This clear silicone paste stops water from rusting your brass cradle blades. Dab a rice-sized drop onto the metal contact pins twice a year.
Skip Cheap Crimp Clips: Flat hardware store crimp ends shake loose fast on bumpy bike paths. Spend eight minutes soldering an XT60 plug so power never cuts mid-turn.
I tested four common wiring options on my commuter bike over two winters. Here is how each supply held up against road rattle and rain.
| Option I Tried | Best Use Case | My Honest Verdict |
|---|---|---|
| Amass XT60 plugs | Main 48V or 52V leads | Best grip and zero heat |
| Anderson Powerpole clips | Fast swaps on cargo bikes | Good, but needs zip ties |
| Solder seal butt tubes | Low-power headlight wires only | Melts under main motor loads |
| Standard electrical tape | Temporary wire bundle holds | Peels off in summer heat |
My Step-by-Step Ebike Battery Replacement Guide Workflow
My complete swap routine takes 20 minutes from old tray removal to test ride. Follow these three stages in order so you never short a live wire.
Step 1: Checking Specs in My Ebike Battery Replacement Guide
Always read the metal label on your motor controller before buying a pack. That small silver box sets your safe voltage and amp limit.
Match your nominal voltage: Look for 36V, 48V, or 52V printed on your old pack case. Never drop down in voltage, or your motor will cut out early.
Read controller max amps: Open your frame box and find the peak current rating on the label. Buy a pack whose BMS (internal safety board) handles five extra amps.
Compare amp-hours (Ah): Amp-hours measure fuel tank size and tell you how far you can ride. Moving from 10Ah to 14Ah gave my commuter bike twelve extra miles.
Cut a cardboard template: Trim a cereal box to match the new pack size before ordering. Hold it inside your frame triangle to verify slide clearance.
Step 2: Mounting the New Cradle and Soldering Clean Plugs
Drain your controller power before you snip or strip your old cradle wires. Stored charge inside the controller capacitors can still pop a loud spark.
Clear stored frame power: Pull your old pack off, then hold the bike power button ten seconds. Your screen will blink once as the controller drains its last drop.
Cut one wire at a time: Snip the red wire first and wrap its tip with tape right away. Never slice both red and black cables together with metal cutters.
Bolt the new cradle down: Line up the new base slots over your frame water bottle bosses. Add a drop of blue thread-lock on both 5mm mounting bolts.
Solder and seal XT60 leads: Slide heat shrink onto each wire before soldering the brass plug cups. Warm the sleeve until clear glue squeezes out both ends.
Check Polarity Twice: Probe your new cradle plug with a meter before clicking it together. A minus sign on the screen means your red and black wires are flipped.
Step 3: Running My Safe First-Charge and Load Test
Charge your new pack to 100% before you roll out on the road. A full first charge lets the internal safety board balance every cell row.
Verify full resting voltage: Unplug the wall charger once its light turns green and wait ten minutes. Touch your meter probes to the pack port to confirm top voltage.
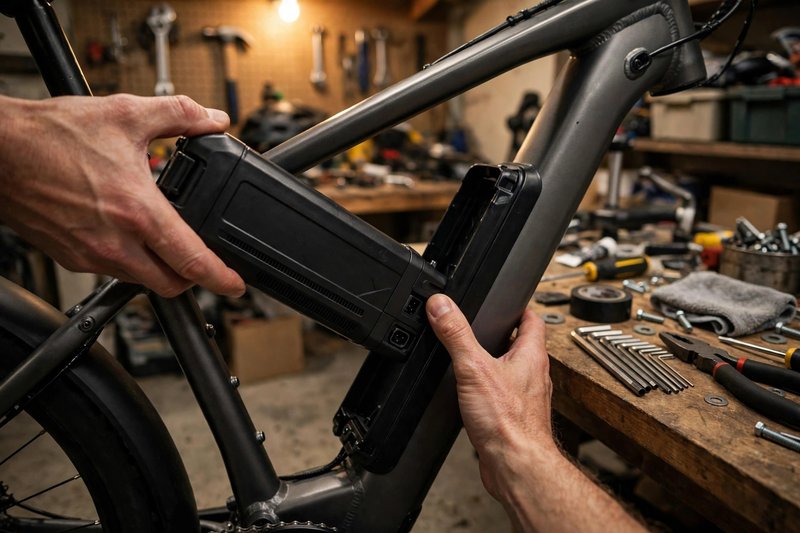
Tug-test the locked case: Slide the pack onto the base until you hear a sharp click. Pull up hard with both hands to confirm the lock pin holds.
Ride a short hill loop: Pedal up one steep block on max assist and feel the yellow plug. The plastic XT60 shell should stay cool to your bare fingers.
| Size / Scenario | Exact Amount | How Often |
|---|---|---|
| 36V pack full charge | 42.0V on meter | Check before first ride |
| 48V pack full charge | 54.6V on meter | Check once a month |
| 52V pack full charge | 58.8V on meter | Check once a month |
| Cradle mounting bolts | 4 Nm to 5 Nm | Check every 200 miles |
Shortcuts That Cut My Swap Time in Half
Pre-wired XT60 pigtails cut my soldering time from 30 minutes down to eight. You can prep your wire leads at a bright desk indoors.
My first swap took an hour because I soldered stiff wires on the floor. Now I build my short adapter harness at my workbench first. Once I step out to the garage, bolting the frame tray takes ten minutes.
Use pre-soldered 12AWG pigtails: Pre-made XT60 wire tails save you from soldering tiny brass cups outside. You only make two quick inline wire splices along the frame tube.
Mark bolt holes with chalk: Rub white chalk over your bottle bosses and press the new tray down. The chalk dots show right where to slide the plastic slots.
Label your new charger cord: Wrap bright tape around your new charger wire and write the voltage on it. Plugging a 52V charger into a 36V pack can start a fire.
Inner Tube Trick: Lay a strip of old rubber bike tube under your plastic cradle base. It stops loud frame rattles on potholes and cushions your cell spot welds.
Timing my own builds showed where home mechanics lose the most minutes. Use this four-step routine to finish your swap in twenty minutes flat.
| Step | Time Needed | Key Shortcut |
|---|---|---|
| Frame fit check | 3 minutes | Cut cardboard box template first |
| Old tray removal | 4 minutes | Hold power button to drain charge |
| Wiring new cradle | 8 minutes | Splice pre-soldered 12AWG XT60 leads |
| Final meter check | 5 minutes | Probe plug before shrinking tube |
Where Things Go Wrong in an Ebike Battery Replacement Guide
Sudden power cuts on hills almost always come from loose cradle pin contact. You can spot and fix most mid-swap hiccups in under two minutes.
Last spring, my neighbor called me after his new 48V pack died outside. His screen lit up fine, yet the motor quit when he twisted the throttle. One look inside his cradle showed a rubber seal blocking the lock latch.
Screen dies on steep hills: Your pack is not pushed all the way down onto the base blades. Press the top nose down firmly while turning the metal key lock.
Charger stays green on empty: Check the small glass fuse hidden behind the rubber charge port cap. A five-amp glass fuse costs fifty cents and pulls out with pliers.
Motor stutters on rough roads: The female metal clips inside the pack base have spread too wide. Gently pinch the slot edges closer by 1mm using a wooden toothpick.
Never Use Metal Picks: Keep metal screwdrivers and paperclips out of your battery discharge slots. Touching two inner blades at once creates a dead short that melts metal.
Keep this quick chart handy during your first week of test rides. Every fix below takes less than two minutes with simple pocket tools.
| Warning Sign | Real Cause | My 2-Minute Fix |
|---|---|---|
| Screen won’t turn on | Key lock in off slot | Turn key clockwise to on |
| Cuts out on bumps | Wide female pin slots | Pinch clip tighter with toothpick |
| Warm yellow XT60 plug | Half-pushed nylon connector | Press ends until loud click |
| Range drops in winter | Cold cells below 40F | Keep pack indoors before rides |
My Monthly Habit That Doubles New Pack Lifespan
Keeping your pack between 20% and 80% charge can double its working years. A five-minute monthly check stops cell drift before you lose road range.
I killed my first replacement pack in a year by leaving it plugged in. Heat and constant full charge wear out lithium cells faster than steep hills. My current pack is past 600 rides and still holds 91% of its range.
Cool the pack before charging: Hot cells hate taking fast current right after a hard summer ride. Let the case cool for 30 minutes before plugging in your charger.
Run a monthly balance charge: Charge to 100% once a month and leave it plugged in one extra hour. This lets the safety board level out every internal cell group.
Store at half charge in winter: Ride the pack down to roughly 50% before long winter storage. Keep it on a dry indoor shelf away from freezing garage floors.
Online bike groups repeat plenty of bad charging tips that ruin new packs. This table compares common internet myths against my meter logs over three years.
| Common Advice | My Real-World Test | Better Move |
|---|---|---|
| Drain to 0% monthly | Deep drains tripped safety lock | Recharge before dropping below 20% |
| Leave charger plugged in | Cooked cells in 14 months | Unplug once green light shows |
| Any 48V pack works | Cheap cells sagged on hills | Buy UL-2271 pack with brand cells |
| Wrap pack in plastic | Trapped moisture rusted pins | Wipe dry and grease blades |
FAQs for ebike battery replacement guide
Yes, most 48V controllers handle a 52V pack safely. Check that your motor controller caps stay rated for at least 60 volts first.
A safe 48V replacement pack costs between $300 and $600. Cheap packs under $200 often use fake cells that fail within six months.
Swap the cradle base too unless pin layouts match. Using the new tray with fresh plugs stops loose pins from melting under load.
Your new pack shuts off when amp draw trips its safety board. Pick a pack with a BMS rated higher than your controller peak amps.
Only use your old charger if the voltage and chemistry match. A 48V lithium pack needs an exact 54.6V max output charger to stay safe.
A complete DIY pack swap takes 20 to 40 minutes at home. Matching plug ends takes the most time if you solder new XT60 leads.
My Final Take on Swapping Your Own Ebike Pack
Swapping your own ebike pack saves $150 in shop labor and takes twenty minutes. My biggest lesson is that tight plugs matter just as much as good cells. Follow this ebike battery replacement guide step by step, and your bike will climb hills like new.
Take five minutes today to pull your old pack and snap a clear label photo. Write down the voltage and amp-hours, then measure your open frame space with a tape. With those three numbers ready, you can order a safe, UL-tested pack that fits right the first time.

Leave a Reply